Users can add the required files which are related to the manuscript.
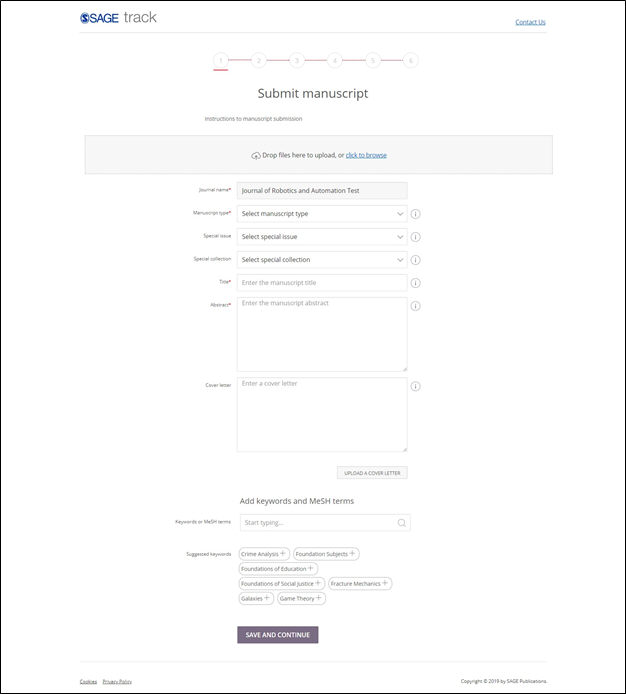
The Instructions text which is entered by the Super User in ‘Instructions/Form Settings’ screen in Journal setup is displayed in this screen.
User can drag and drop files in this tab. Multiple files can be selected at the same time. User can drag and drop the file or can browse to select the required files. User will not have the option drag and drop the files in ‘Safari’ browser.
User can arrange the various files to reflect the correct order in PDF, by using reorder buttons.
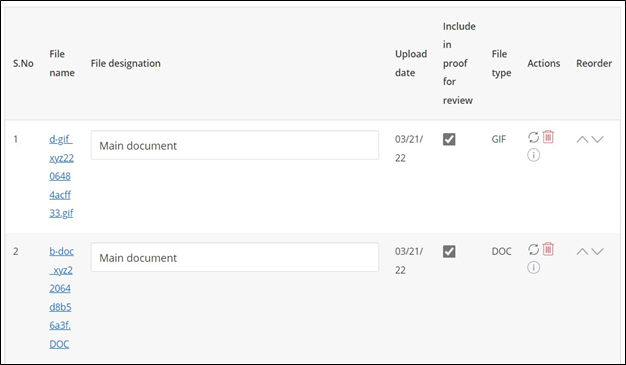
Once the files are selected then User needs to select the ‘File Designation’ from the drop down list after uploading the document. If User clicks on the ‘Next’ button without selecting the File designation then a warning message is displayed stating 'A file designated " required file designation1" is required for submission to this journal’ . The uploaded file will be displayed with a link to download the file by clicking on it.

While uploading file, the last uploaded file will display on top(1st) in the grid and first uploaded file will display at bottom (last).
Note- when the file name exceeds to 150 characters then a message is displayed as - The file name [file name] exceeds [maximum number of characters]. Please save the file with a new name and upload it again.
User can only attach & view files on desktop and tablet.
· In Journal setup if User selects the Mandatory File designations as ‘Decision file’ then User needs to upload the required decision file in this tab. The decision file will be in a pdf format.
· User can browse and upload the required document.
· User needs to check the ‘Include in Proof for review’ check box to include the uploaded documents in the Manuscript.
· Based on the type of uploaded document, the File type will be displayed.
· If Users select the latex option is selected in journal setup then user should be allowed to uploaded latex files.
· If Users select the latex option in journal setup then user should not be allowed to select any other file than latex for inclusion in manuscript.
· Users can click on the ‘Up’ or ‘Down’ arrow to select the order of the uploaded documents.
· If Users wants to delete the uploaded file, click on ‘Delete’ icon in the Actions field.
User can only extract data from the files which are in‘.doc/.docx’ format.
Click on ‘Next’ button to move to the next screen or click on ‘Save as Draft’ button to complete the Manuscript submission at a later point of time.
Users can submit a New manuscript from this screen. The manuscripts can be saved in Drafts and submitted once all the details are filled.
1. Journal Name: The Journal name is auto populated in this field. User will not be able to edit this field
2. Manuscript Type: The Manuscript type can be selected from the drop-down list in this field.
3. Title: Enter the title of the Manuscript in this field. This is a free text field.
4. Sub Title: Enter the sub title of the Manuscript in this field.
5. Abstract: Enter the Abstract in this field. This is a free text field.
6. Cover Letter: Users can enter the Cover letter data in this field. User can either enter data in this field or Upload a File by clicking on ‘Browse’ button.
7. The check box ‘Are you interested in reviewing manuscripts for this journal’ is available when configuration in Journal Setup in Manuscript settings screen is turned on.
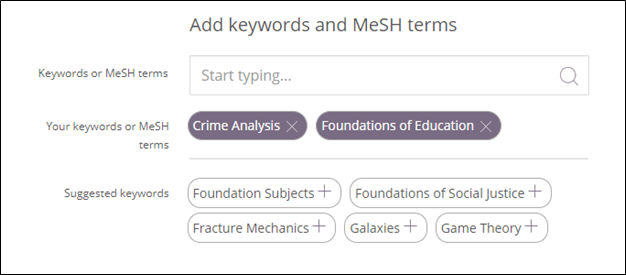
8. Keywords and MeSH terms : below are the following fields displayed.
1. Keywords or MeSH terms
• User can add Keywords or MeSH terms by typing, then an autosuggest filters results with matching characters in bold will be displayed.
2. Your Keywords or MeSH terms
• Shows Keywords that the user has selected, as a dark 'pill' icon.
• user needs to click the 'x' icon on a selected Keywords, then the Keywords will be removed from the 'Your Keywords or MeSH terms'.
3. Suggested Keywords or MeSH terms
• Shows predefined keywords for that journal in a white 'pill' icon. If there are more than 20 suggested keywords, then 20 will display by default, and a 'Show more' link will appear beneath. If user clicks 'show more' then entire list displays.
• Suggested interests grid will be displayed only when the environment is used with the journal information via from the URL or by the journal name field from the login screen.
• User selects a 'pill' from the 'Suggested interests' section by clicking on “+” icon then it appears in the 'Your interests' section and disappears from the 'Suggested interests' section.
• User deselects an interest by clicking on “X”, and the interest is a journal keyword then the interest reappears in the 'suggested interests' section.
Keywords and MeSH terms will be entered in the same place, but different journal configurations will determine which vocabulary each journal uses.
If both the keywords and mesh terms are allowed then the dropdown menu will display 'Journal keywords' at the top of the list and 'MeSH terms' would be displayed below them.
If keywords are configured for the respective journal then heading will be displayed as "Add keywords", If Mesh terms are configured then heading will be displayed as - "Add MeSH terms", If both are configured then heading will be displayed as - "Add keywords and MeSH terms".
9. Author/Coauthor: The Author will be added by default in the Add Author page. By default, Corresponding author radio button will be selected.
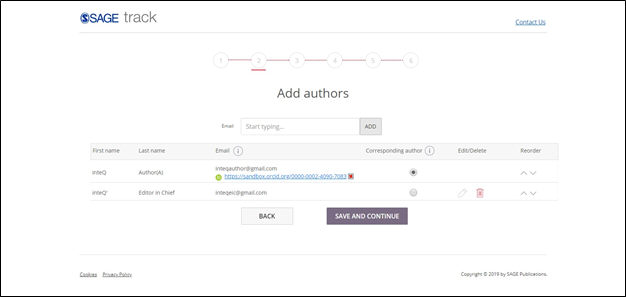
User can search existing users in the email field and click add button to add a co-author.
If user match is not obtained then following popup is used to create a new user and add it as co-author.

As an Author user can edit the co-author details which are created by the same respective Author.
An author can only edit a co-author created by him.
As an Author he/she cannot edit a pre-existing user details if he is selected as co-author.
Author can edit this Co-author details only in the respective manuscript he is creating Co-author.
If Author uses the same author in another manuscript then he becomes a preexisting user and thus non-editable.
Author can edit the co-author details only till he is not logged in till the first login.
Once Co-author logged in, in the system and review his profile then Author cannot edit the co-author details.
Note - User can only edit authors on desktop and tablet.
7. ORCID link ”Create or Connect your ORCID iD ” will be displayed to connect to ORCID site for the author
· If account exist and on successful login the user is asked for permission to Authorize the STS site to access the ORCID id record.
· When Authorization is complete the STS site will have auto filled the ORCID id as a hyperlink
· If User clicks on Deny the permission then the ORCID popup would be closed with message "ORCID ID connection denied"
· If a STS user does not have ORCID ID, then there is an Option to "Register now". Once clicked on Register now user is taken into "Registration" page and Auto fill the details (first name, last name, primary email, secondary email) on the ORCID id page by fetching the data provided by user in STS profile page.
· On the completion of registration user is automatically logged in ORCID and asked for permission to Authorize the STS site to access the ORCID id record.
· When we disconnect the ORCID id whether it is from manuscript submission page or profile page it will be disconnected from the USER information as well.
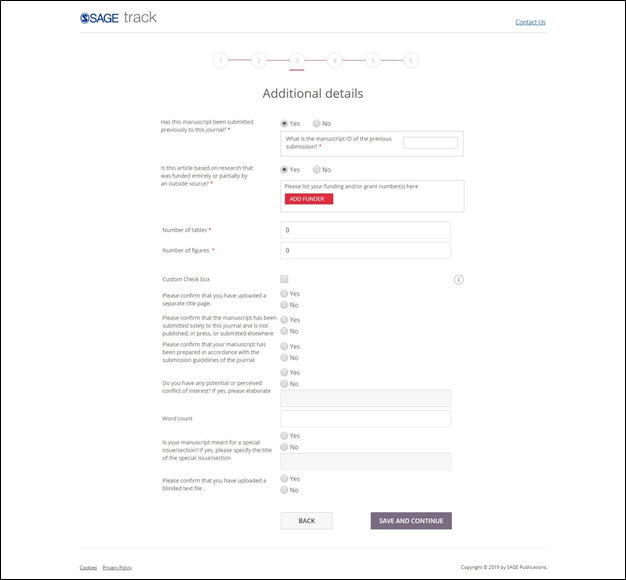
In additional Details tab, Custom questions are displayed and these questions are mandatory.
· User needs to select the required radio button if he/she has submitted the Manuscript previously for the journal. If User selects the ‘Yes’ radio button then User has to enter the latest Manuscript id which was submitted for this Journal.
User needs to select if the article is funded by an outside source. If User selects the ‘Yes’ radio button then User has to add the Funding details by clicking on the ‘Add Funder’ button.
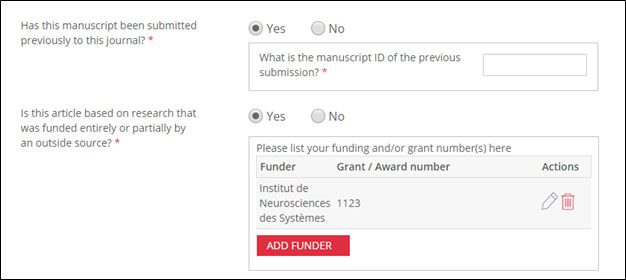
A pop up screen is displayed where User has to enter the funding details.
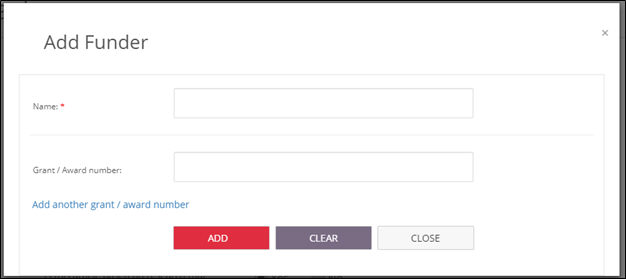
The Name of the funder is a mandatory (*) field and it auto populates the funder name by entering the starting few letters of the funder name. The funder name is auto populated from a third party application.
User needs to enter the Grant/Award number of the Funder but it is not a mandatory field. User can also add multiple Grant/Award number by clicking the ‘Add another grant / award number’ link.
Click on the ‘Add Funder’ button to add the Funder details.NOTE: Duplicate Funder name and Grant /Award number is not allowed. User can edit or delete the Funder information.
Provide the details about the Number of Pages in Main document.
· Enter the number of tables in the Main document.
· Enter the number of color figures.
· Enter the Number of Black and white figures.
· Enter the Number of figures.
· Select the required Custom radio button.
· Select the required Custom checkbox radio button.
· Select the required Custom dropdown from the drop-down list.
· Enter the required Custom free text.
· Select and enter the required Custom radio text.
· Select and enter the required Custom checkbox text.
Select the required Custom dropdown text.
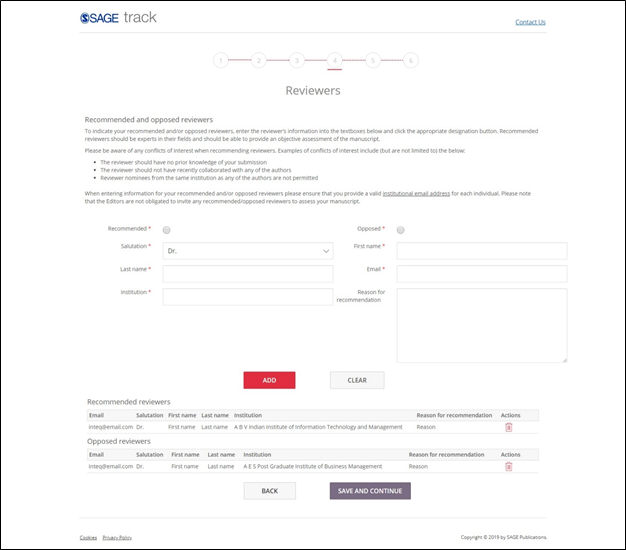
Users can add recommended and opposed reviewers in this tab:
1. Select the Salutation from the dropdown list.
2. Enter the First name and Last name in the fields.
3. Enter the email address of the User.
4. Recommended Reviewers and Opposed Reviewers should be Radio buttons. By default no radio button is selected.
5. Data is populated in the Recommended Reviewers and Opposed Reviewers when data is entered in the fields and User clicks on ‘Add’ button.
Note - recommended and opposed reviewers cannot edit in mobile.
6.
This tab will appear only if the Journal is an 'Open Access' journal. User has to complete the Payment information tab to submit the Manuscript.
A mandatory check box will be available with the Text – “Please read and accept the following agreement to proceed with manuscript submission: I understand that this is an open access journal and as such an article processing charge (APC) will be payable, if after peer-review, my paper is accepted for publication. Please refer to the manuscript submission guidelines for information about the specific APC which may apply.”
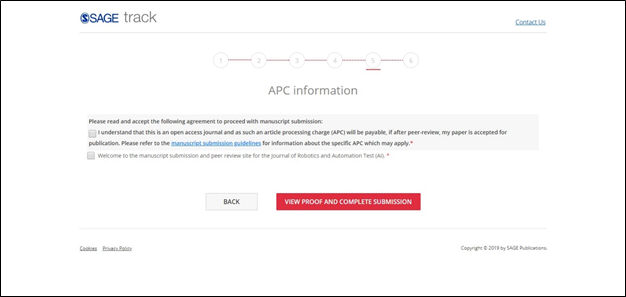
Once User clicks on ‘View and Confirm Manuscript Proof’ button, the below screen is seen and user needs to click on ‘Submit manuscript ’ button to submit the Manuscript.
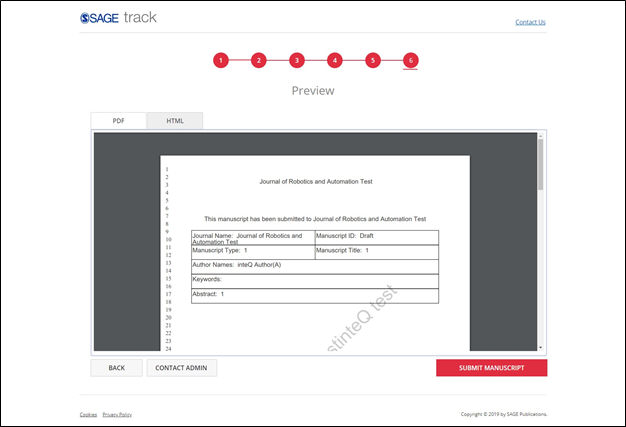
When User clicks on ‘Submit manuscript’ button, a pop up screen is displayed with a Manuscript id.
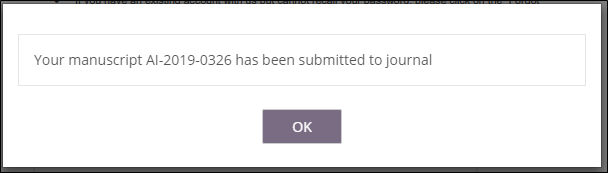
The Manuscript id is Journal specific. For a given journal, the Journal id will remain unique but if three Manuscripts which are submitted for the journal then the Manuscript id keeps changing.
Example:
JOURNAL1 --> JOURNAL1+MANUSCRIPT ID1, JOURNAL1+MANUSCRIPT ID2.
JOURNAL2 --> JOURNAL2+MANUSCRIPT ID1, JOURNAL2+MANUSCRIPT ID2.
In this example, the Journal id is constant but if a new manuscript is submitted for any journal then the Manuscript id’s keep changing for a particular journal. For the same Journal if two or more Manuscripts are submitted then the Journal id remains constant but only the Manuscript id changes.